433 MHz Devices
Why 433 MHz?
While Wifi, Zigbee, Z-wave, and Matter/Thread are great, sometimes you just need a simple sensor that does one thing really cheaply. 433MHz devices (and others like 915MHz and 868MHz) are one-way sensors that can talk to Home Assistant to report things like temperature, water, moisture, open/close and much more.
The advantages of these devices are:
- They are cheap
- They are everywhere
- They have extremely long battery life
- They have decent range
- You might already have some
- The communication protocols are simple and reliable, no device pairing needed
The downsides are:
- You need a special receiver, called an SDR (Software Defined Radio)
- Sensors can sometimes require more configuration
- It can be difficult to determine which devices are supported
- Not everything listed as 433MHz can be used
- Setting up your SDR receiver takes more steps, but this guide will guide you
And as either a downside or an upside depending on your view is that you might learn a lot about your neighbors.
Equipment
SDR receiver
The most important thing you will need is a SDR receiver. This is a USB device with an antenna which can receive radio signals and pass them to your HA device.
I purchased the Nooelec NESDR Mini 2+ as an entry level device for under $40, but there are a range of devices of all prices out there. Just do a quick search to ensure it works with Home Assistant. If the Mini 2+ isn't on sale, the regular NESDR Mini 2 is great too. Any device using a Realtek chip should work. Other companies make chips, but these are very affordable ones. You'll often see the term rtl referenced, which stands for Realtek Limited (Examples: rtl-srd, rtl-433).
Sensors
You're going to want something to sense. Here are some good suggestions to start with, but as you get comfortable search around for more device types, as you can do so much with SDR!
- Temperature/Humidity:
- Water/Leak:
- Govee
- I have not yet verified these actually use 433, they may have changed to LoRa
- Govee
- Motion Detection:
- Still investigating
- Soil Moisture:
Remember how I mentioned learning about your neighbors? Chances are that you and your neighbors already have some devices transmitting on 433MHz. Before I ever turned on my first sensor, my alarm system door sensors and my neighbors soil sensors both popped up in Home Assistant! Car TPMS (Tire Pressure Monitoring Systems) also show up, but because you likely don't want to hace a dashboard filled with every car that drives by these are disabled by the default config below.
Setting Up Your SDR Receiver
You're receiver has arrived, let's set it up! If your sensor has arrived too, great! If it hasn't lets set the receiver up anyway and see what we find.
Note: If you want to play with the SDR receiver on your linux desktop/laptop first, see my guide here: https://www.wswapps.com/books/debian-ubuntu-pop-os/page/install-configure-sdr-receiver
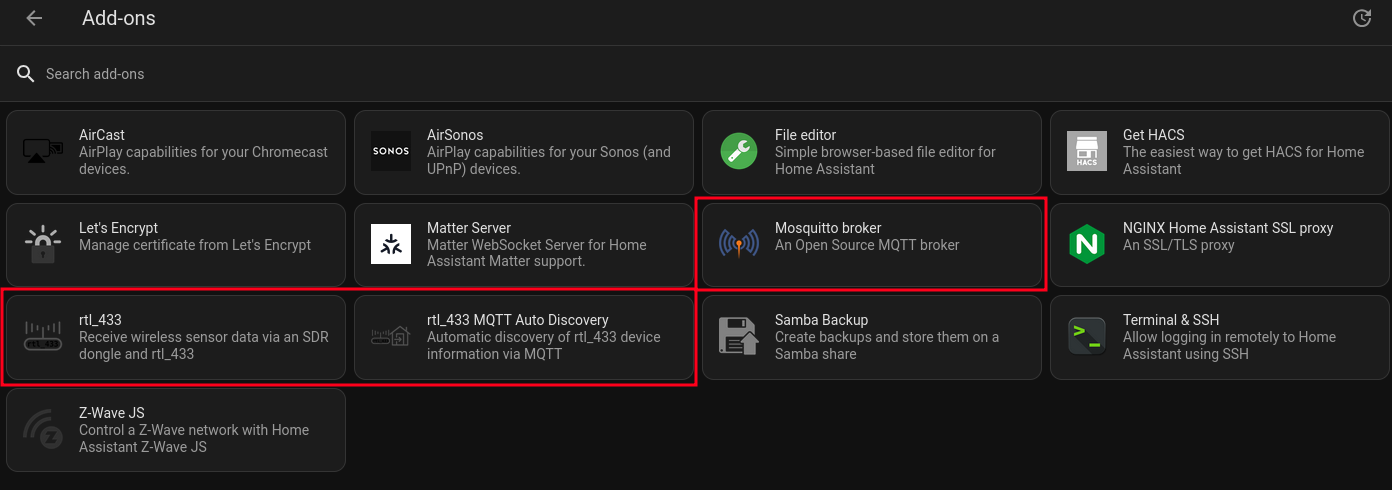
Add-on Installation
- From HA, go to Settings > Devices & Services > Add Integration > MQTT
-


- No configuration is needed
- This add-on is necessary to take in the detected sensors/messages and publish them to Home Assistant as devices and sensors
https://github.com/pbkhrv/rtl_433-hass-addons
- This new repository contains the repos we need to use the SDR receiver
- rtl_433
- rtl_433 MQTT Auto Discovery
- You can remove/disable this later if you prefer, but it will make getting started a lot easier. This add-on will auto-detect nearby devices and add them to HA MQTT automatically
Add-On Configuration
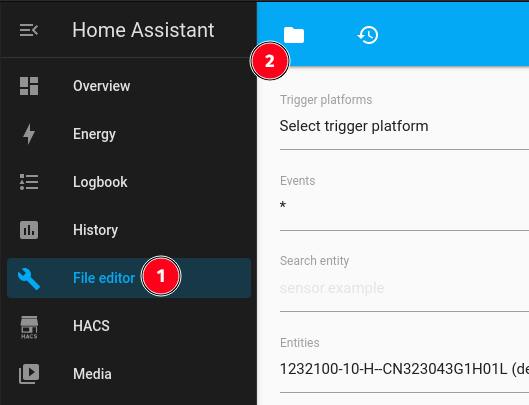
We're almost done. We now need to create a configuration file for rtl_433. To do that you need a way to upload or edit files in Home Assistant. If you have a favorite way, use that. For this demo I will use the File Editor which you can install from the Add-on section. make sure to enable "Show in sidebar" for the File Editor after installing and starting it.
# before output kv
frequency 433.92Mconvert si
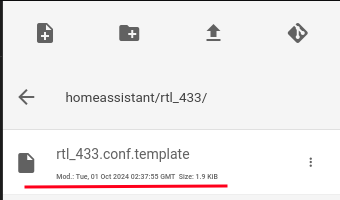
rtl_433.conf.template
# This is an empty template for configuring rtl_433. mqtt information will be
# automatically added. Create multiple files ending in '.conf.template' to
# manage multiple rtl_433 radios, being sure to set the 'device' setting. The
# device must be set before mqtt output lines.
# https://github.com/merbanan/rtl_433/blob/master/conf/rtl_433.example.conf

output mqtt://${host}:${port},user=${username},pass=${password},retain=${retain}
report_meta time:iso:usec:tz

# To keep the same topics when switching between the normal and edge versions,
# use this output line instead.
# output mqtt://${host}:${port},user=${username},pass=${password},retain=${retain},devices=rtl_433/9b13b3f4-rtl433/devices[/type][/model][/subtype][/channel][/id],events=rtl_433/9b13b3f4-rtl433/events,states=rtl_433/9b13b3f4-rtl433/states

# Uncomment the following line to also enable the default "table" output to the
# addon logs.
output kv

frequency     433.92M
convert    si


# Disable TPMS sensors by default. These can cause an overwhelming number of
# devices and entities to show up in Home Assistant.
# This list is generated by running:
# rtl_433 -R help 2>&1 | grep -i tpms | sd '.*\[(\d+)\].*' 'protocol -/run.sh'
#    [59]  Steelmate TPMS
#    [60]  Schrader TPMS
#    [82]  Citroen TPMS
#    [88]  Toyota TPMS
#    [89]  Ford TPMS
#    [90]  Renault TPMS
#    [95]  Schrader TPMS EG53MA4, PA66GF35
#    [110]  PMV-107J (Toyota) TPMS
#    [123]* Jansite TPMS Model TY02S
#    [140]  Elantra2012 TPMS
#    [156]  Abarth 124 Spider TPMS
#    [168]  Schrader TPMS SMD3MA4 (Subaru)
#    [180]  Jansite TPMS Model Solar
#    [186]  Hyundai TPMS (VDO)
#    [201]  Unbranded SolarTPMS for trucks
#    [203]  Porsche Boxster/Cayman TPMS
protocol -59
protocol -60
protocol -82
protocol -88
protocol -89
protocol -90
protocol -95
protocol -110
protocol -123
protocol -140
protocol -156
protocol -168
protocol -180
protocol -186
protocol -201
protocol -203Later on we'll edit this config file to listen to more than one frequency in case you have devices on other frequencies. Go back to Settings > Add-ons, select rtl_433 and restart it. Check the Log tab and you should see your SDR receiver detected. Let it run for a few minutes and refresh the logs to see if it detects anything. It may not if you aren't nearby any sensors.
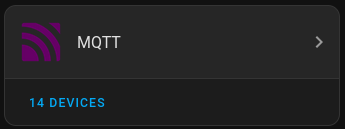
This setup process will automatically detect new sensors and add them to the MQTT integration within HA. There will not be a notification of a new device, they will just show up and you can Disable them if you don't want them. If you find too many devices are showing up, you can disable the rtl_433 MQTT Auto Discovery Add-on. Down below we'll discuss adding a sensor manually if needed.
Configure a Sensor
If you have the rtl_433 MQTT Auto Discovery Add-on enabled, you don't need to do anything. Any commonly recognized devices will show up automatically in the MQTT integration for you to begin using. If you aren't using Auto Discovery or your devices is not one that can be auto discovered, it can be manually configured.
TODO: documentation on manually configuring a sensor
Monitor Multiple Frequencies
To monitor multiple frequencies, you need to update your rtl_433.conf.template file.
hop_interval 30frequency 915M
Example:
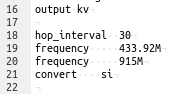
The hop_interval defines how many seconds each frequency will be scanned, before hopping to the next. If you want one frequency scanned more than another, you can list the same frequency multiple times.
The downside of this is that there is a period of time where you are not scanning each frequency and can miss messages. To scan each frequency without missing anything you would need to get an additional SDR receiver per frequency and configure multiple config files. This guide doesn't cover that setup (yet).
More info:Info
Here is a collection of resources and guides I used to help me get started with SDR and 433Mhz in Home Assistant:
Guides to follow:
Multiple Frequencies:
hop_interval 60
frequency 915M
frequency 433.92M
More info: https://community.home-assistant.io/t/home-assistant-add-on-rtl-433-with-mqtt-auto-discovery/260665
Then Install Addons: rtl_433, rtl_433 MQTT Auto Discovery
Config example: https://github.com/merbanan/rtl_433/blob/master/conf/rtl_433.example.conf